It's important to protect your work from piracy and ensure that your users are using the latest version of your plugin. This is where license validation and auto-update functionality come into play.
To add license validation to your WordPress plugin, you will need to create a licensing system that verifies the validity of a license key. This can be done through a remote server or by embedding the validation code in your plugin.
Adding auto-update functionality to your plugin will allow users to easily update to the latest version of your plugin without having to manually download and install the update. This can be achieved by creating an update server that hosts the latest version of your plugin and providing an API endpoint for your plugin to check for updates. When a new version is available, your plugin can download and install the update automatically.
Luckily, you don’t have to do any of this because Anystack has already done the hard work for you. In this article, we will go through the steps required to add license validation and auto-update functionality to your WordPress plugin. We will cover the licensing system setup, the implementation of license validation and auto-update features using Anystack’s plug and play library. By the end of this article, you will have the knowledge required to protect your plugin from piracy and provide a seamless user experience for your users.
In this demo we will use a very simple example plugin that could show some financial information to our users. You can find the entire plugin below:
1<?php 2/* 3Plugin Name: Demo 4Plugin URI: http://anystack.sh 5Description: Example plugin 6Author: Philo Hermans 7Version: 0.0.1 8Author URI: https://anystack.sh 9*/10 11add_action( 'admin_notices', 'daily_revenue' );12 13function daily_revenue() {14 echo '<p>Your revenue for today is $123.45</p>';15}If you install this plugin, it will show the “Your revenue for today is $123.45” message at the wp-admin dashboard. Our goal is to add license validation to this plugin to ensure the revenue functionality only works when a valid license has been provided. We also want to enable automatic updates for our plugin if a valid license is active.
We are going to use Anystacks WP Guard library to make this entire process very easy. Head over to the release overview and download the latest version of wp-guard.zip (you don’t need the source code, this will not work).
Extract the zip file inside the director of our plugin, so our plugin directory looks like:
wp-content/plugins/demo/demo.phpwp-content/plugins/demo/wp-guardNext, we want to require the library inside our demo.php
1<?php 2/* 3Plugin Name: Demo 4Plugin URI: http://anystack.sh 5Description: Example plugin 6Author: Philo Hermans 7Version: 0.0.1 8Author URI: https://anystack.sh 9*/10 11require 'wp-guard/src/WpGuard.php';12 13// ...Finally, we want to initiate the library. On the GitHub releases page you might have noticed the mention of the release namespace. Due to how WordPress works the library has to be versioned using a version namespace. If you update the library to a new version you will also have to update the namespace in your code. But don’t worry, updating the code should only take 10 seconds.
1// Notice the V001 namespace. This should be updated if you update to a new version of the library.2$guard = new Anystack\WpGuard\V001\WpGuard(3 __FILE__, // This is used to identify your plugin4 [5 // Configuration options6 ]7);Perfect! Now that we have the library installed we can configure the options required to use the library:
1$guard = new Anystack\WpGuard\V001\WpGuard(2 __FILE__,3 [4 'api_key' => '4qB4xTPS8d6P0VYePmrctPq9C1PrZGm6',5 'product_id' => '988751e8-862f-4210-9ee3-84b3832834cd',6 'product_name' => 'Demo',7 ]8);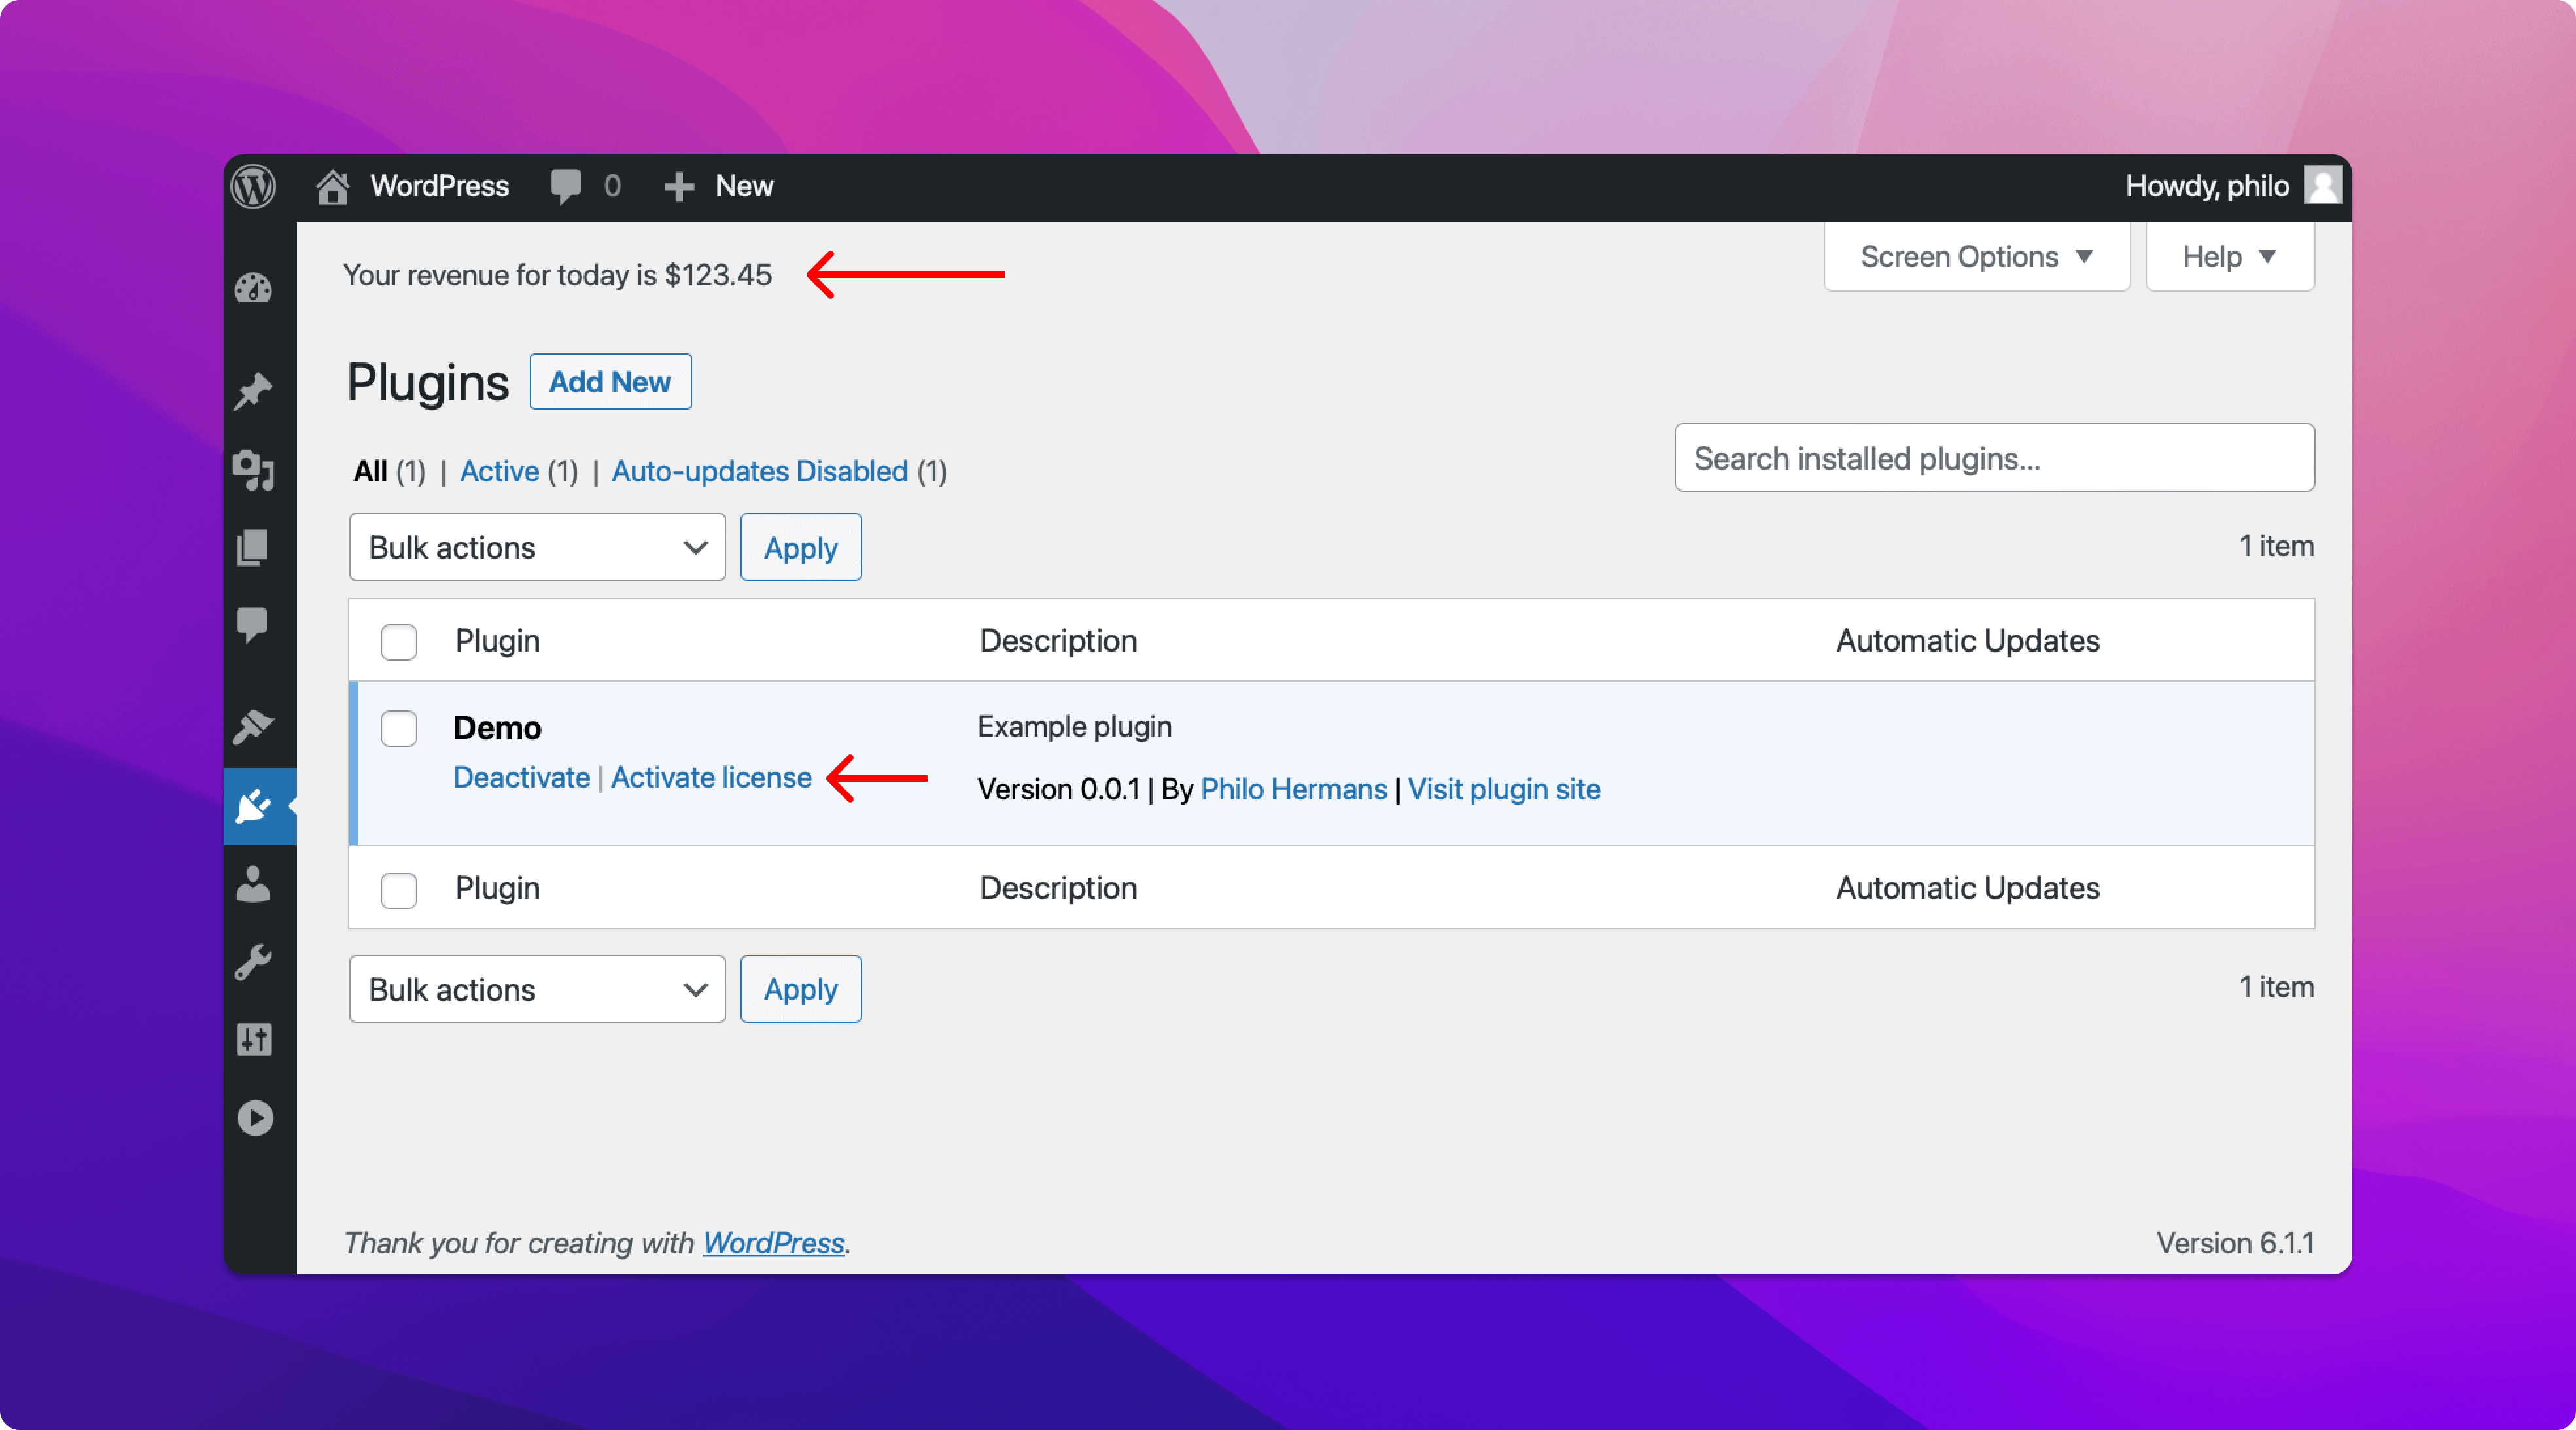
All set! When you activate the plugin you will notice that an ‘Activate license’ link has become visible on the plugin page (the option can also be found in the plugins menu). The other thing you will notice is that our premium feature, showing the revenue, is also visible. Let’s start by updating our code to only show this when a valid license is active.
The library offers a callback that will only run when a license is active. In this example, we move our admin_notices action inside the validCallback.
1$guard->validCallback(function() {2 add_action( 'admin_notices', 'daily_revenue' );3});If you refresh your browser you will see the revenue is now hidden. Let’s move on to the activation of our license. Before we can activate our license we need to have a license key.
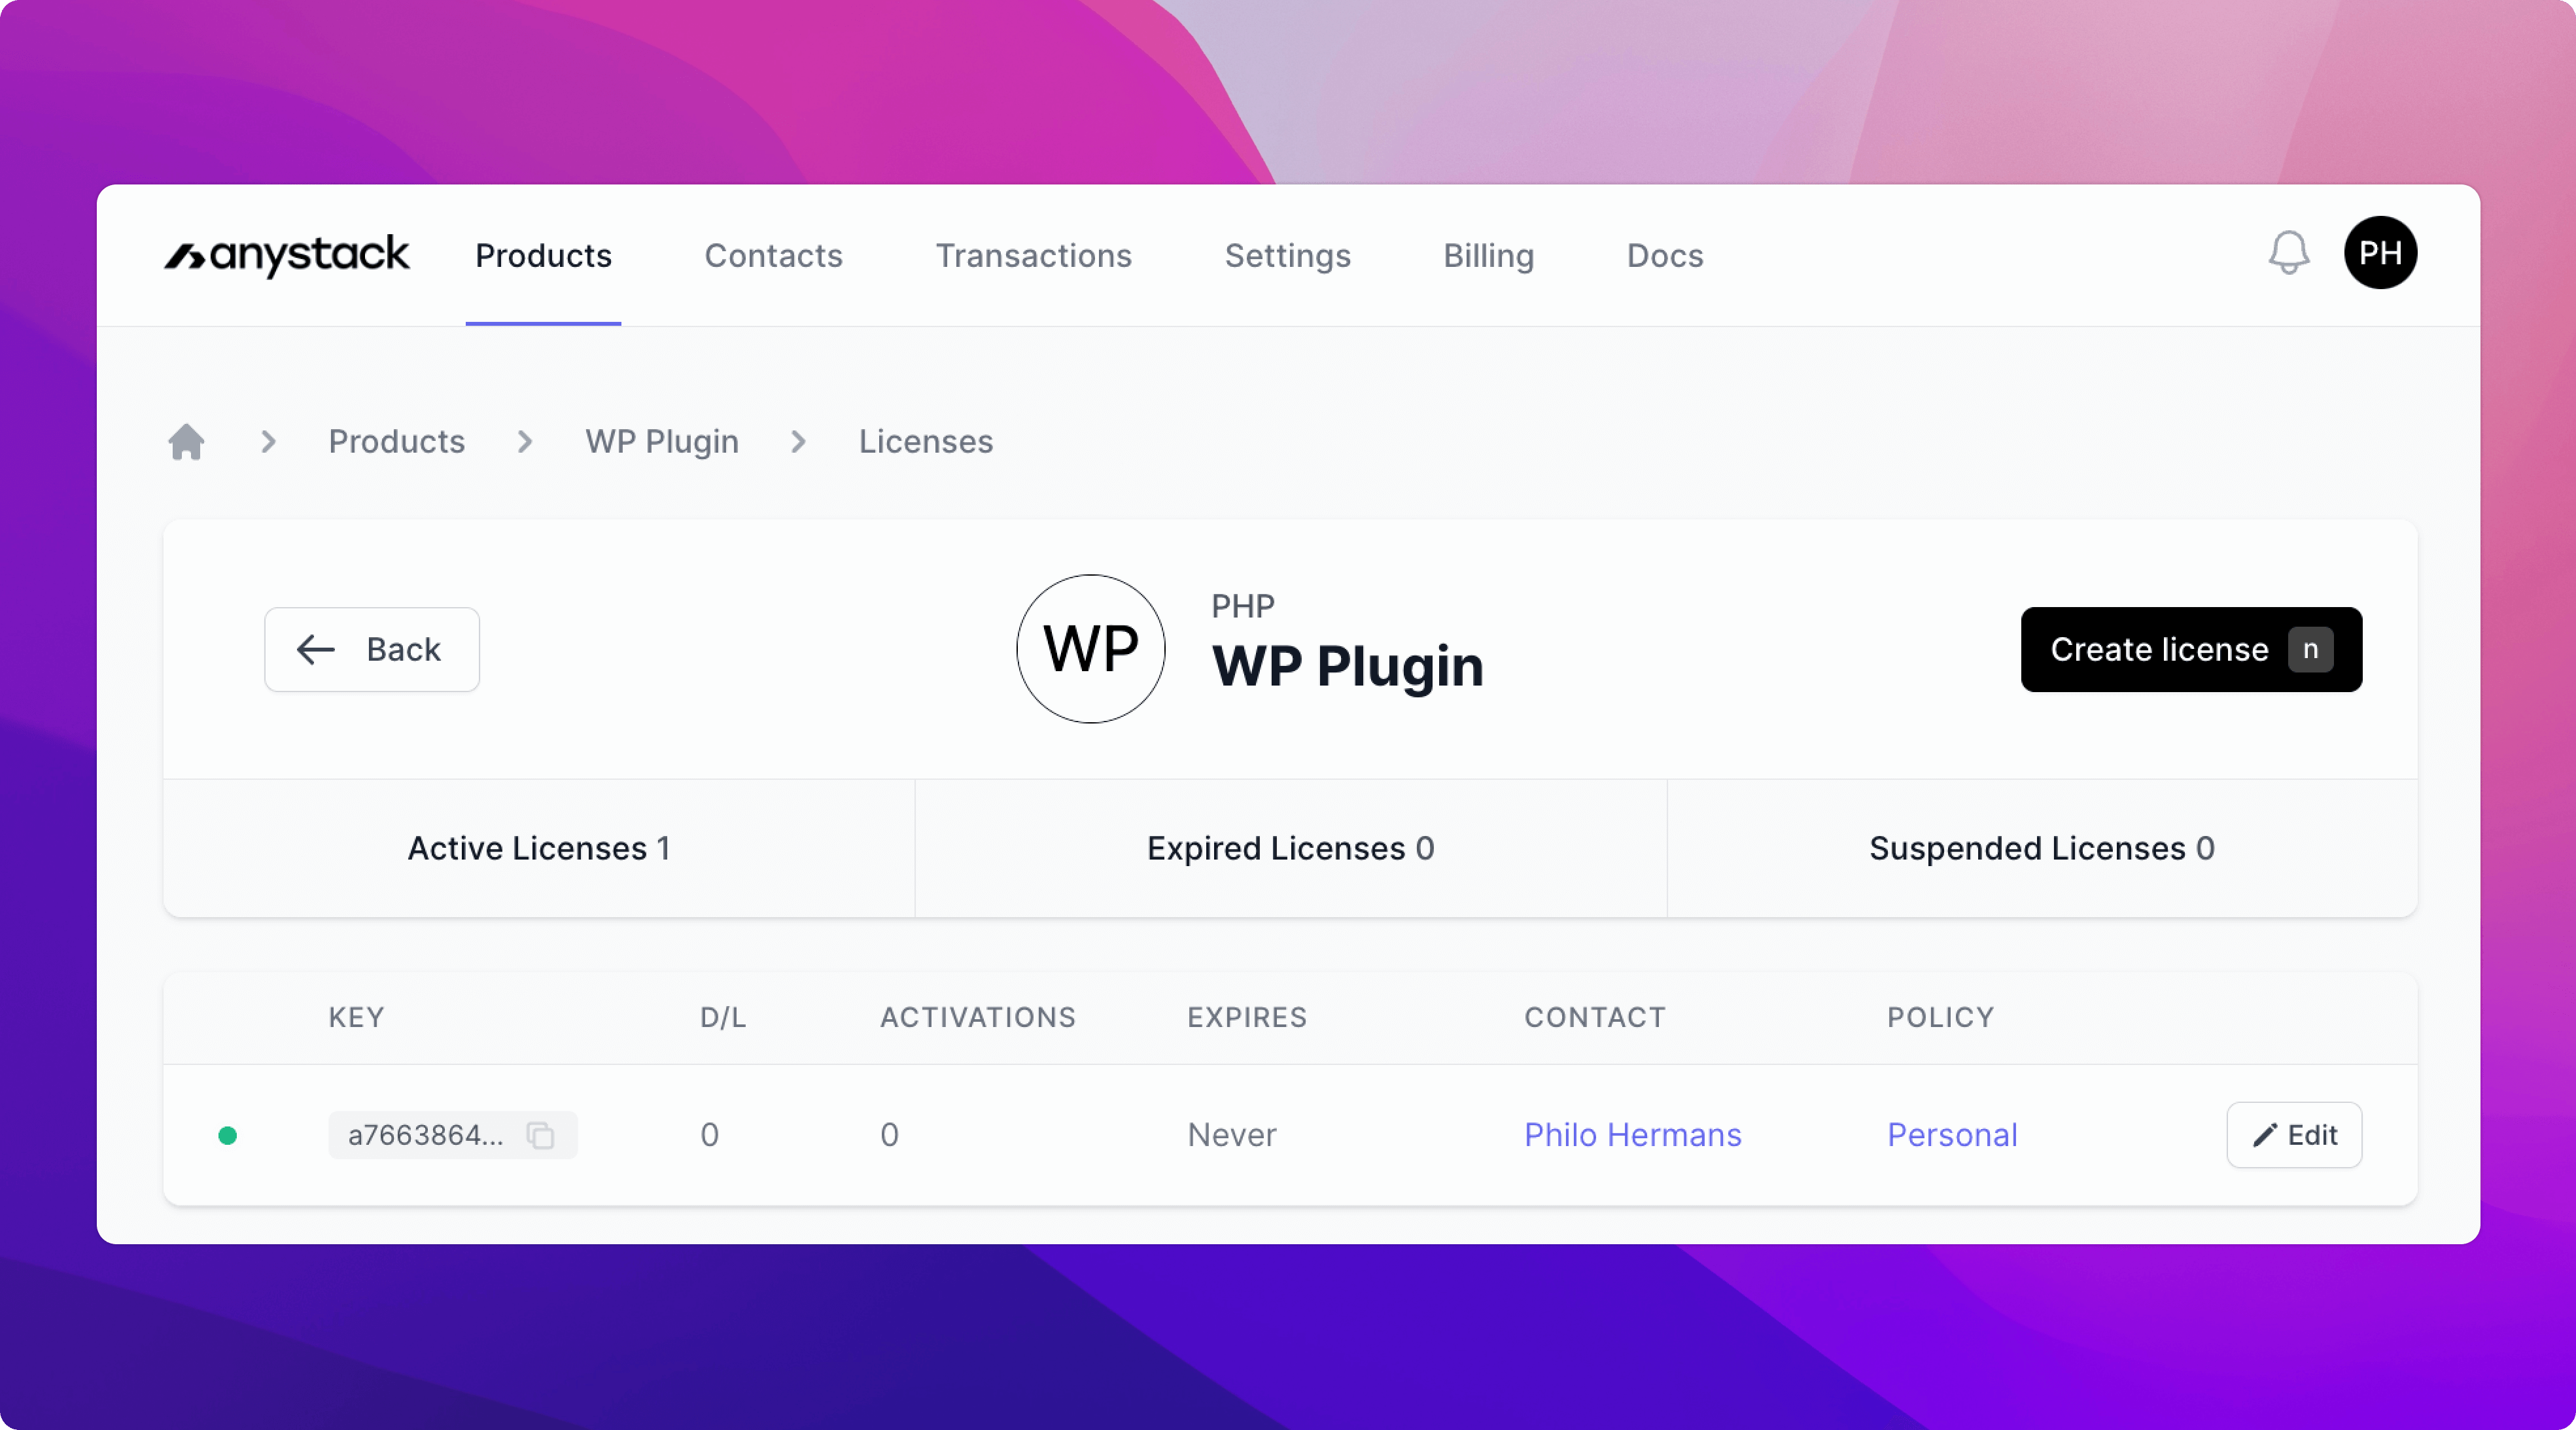
From your Anystack product license overview you can find all your licenses and also create new licenses. Create a license and copy the license key.
Switch back to your WordPress dashboard and visite the plugin license activation page. You will be prompted to enter your license key. If you want to add an additional layer of security you can also require a user to enter their email address. The email address must match with the assigned contact email that is associated with the license.
To enable the email requirement, we can update the WP Guard config array:
1$guard = new Anystack\WpGuard\V001\WpGuard( 2 __FILE__, 3 [ 4 'api_key' => '4qB4xTPS8d6P0VYePmrctPq9C1PrZGm6', 5 'product_id' => '988751e8-862f-4210-9ee3-84b3832834cd', 6 'product_name' => 'Demo', 7 'license' => [ 8 'require_email' => true, 9 ],10 ]11);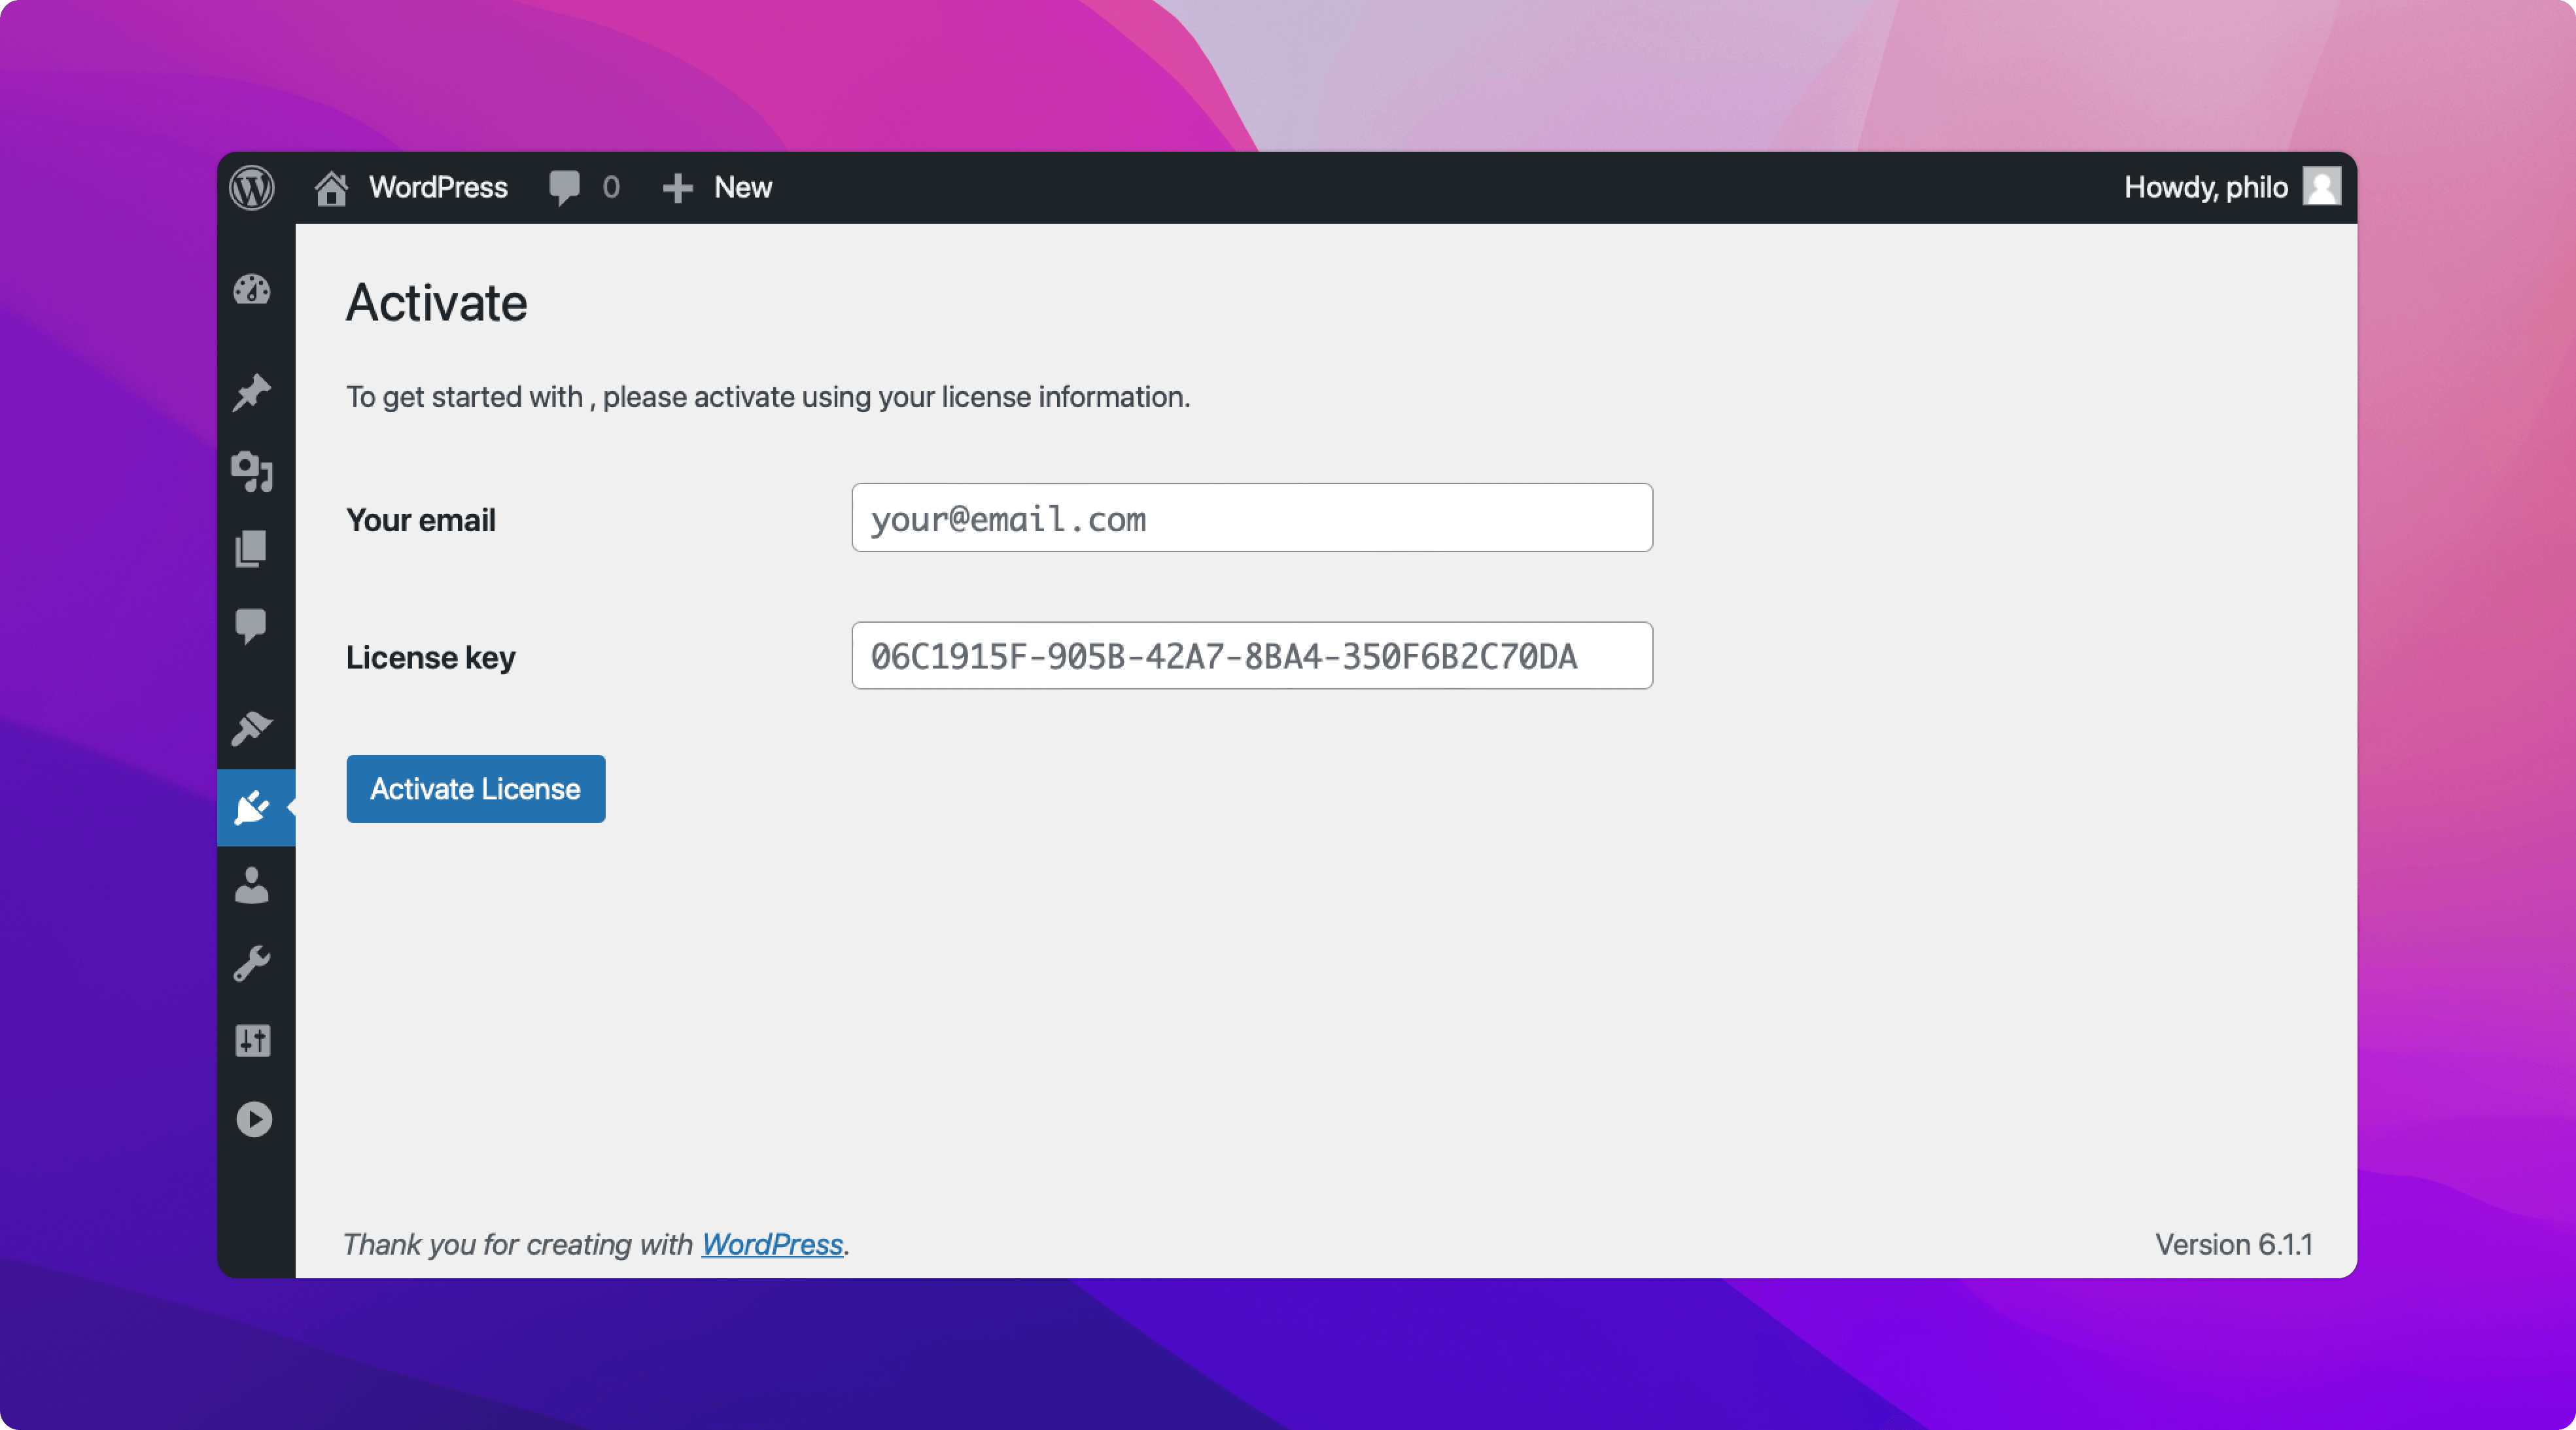
If you want to modify the look and feel of the activation page you can use the config to provide an alternative template for this page:
1$guard = new Anystack\WpGuard\V001\WpGuard( 2 __FILE__, 3 [ 4 'api_key' => '4qB4xTPS8d6P0VYePmrctPq9C1PrZGm6', 5 'product_id' => '988751e8-862f-4210-9ee3-84b3832834cd', 6 'product_name' => 'Demo', 7 'license' => [ 8 'require_email' => true, 9 ],10 'pages' => [11 'activate' => 'my-custom-activation-page.php',12 ],13 ]14);Please reference wp-gurad/pages/activate.php to ensure you include the required fields.
In case you haven’t tried already, enter your email and/or license key and activate your license. You should see the message that the license has been activated. If you continue back to the wp-admin dashboard you will now notice the revenue message is shown again because our license is valid.
The license key is verified every hour. If you suspend the license, the plugin core functions will be disabled automatically. In case you don’t want to add such a destructive action, you can simply choose not to use the validCallback callback.
Finally, we can enable the automatic updater for our plugin. We will use the config array again to do this:
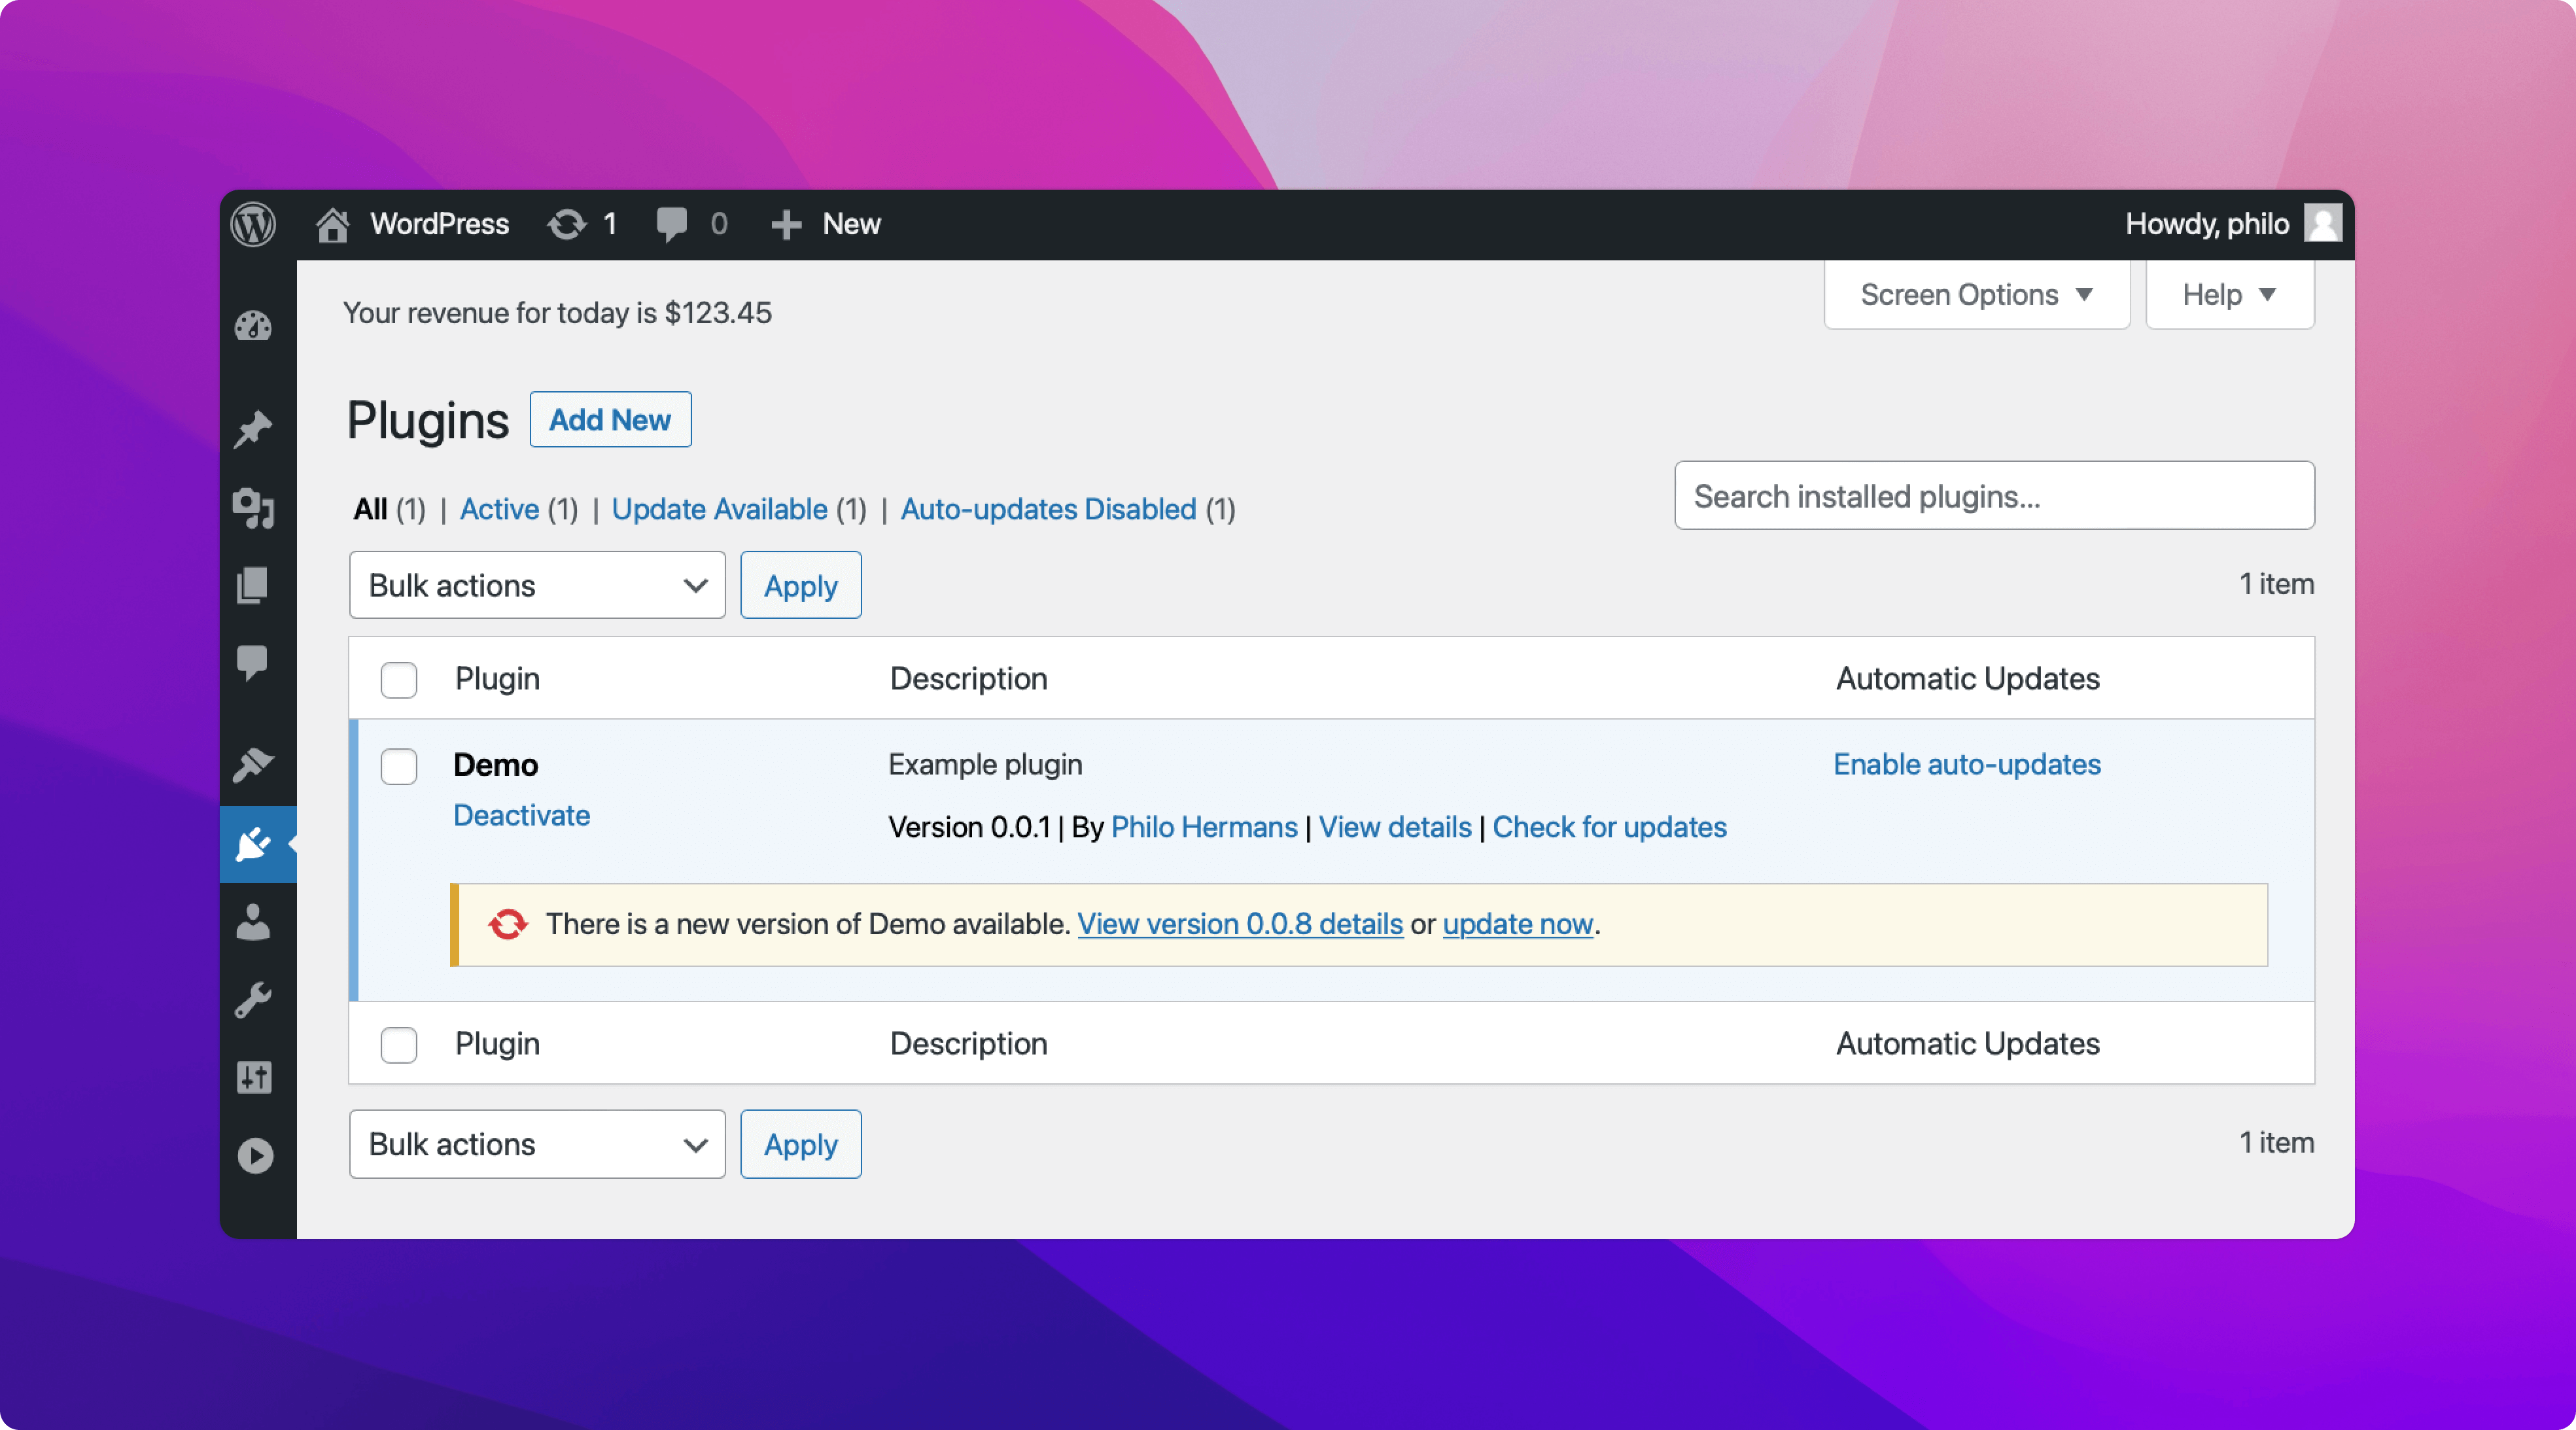
1$guard = new Anystack\WpGuard\V001\WpGuard( 2 __FILE__, 3 [ 4 'api_key' => '4qB4xTPS8d6P0VYePmrctPq9C1PrZGm6', 5 'product_id' => '988751e8-862f-4210-9ee3-84b3832834cd', 6 'product_name' => 'Demo', 7 'license' => [ 8 'require_email' => true, 9 ],10 'updater' => [11 'enabled' => true, // Enable auto-updater12 ]13 ]14);If you publish a new version of your plugin you should see that an update is available for your plugin:
You can distribute your WordPress plugin with additional data by creating a file called updater-info.json in the root of your repository. Below you can find some examples of what you can include in this file:
1{ 2 "requires":"5.0", 3 "tested":"4.8", 4 "upgrade_notice":"Here's why you should upgrade...", 5 "author":"Anystack", 6 "author_homepage":"https://anystack.sh", 7 "sections":{ 8 "description":"My plugin <strong>description</strong> here" 9 }10}Let's take a look at all the available options and what they do:
The minimum WordPress version required to run this plugin.
Inform your customers with which WordPress version you have tested your plugin.
Display a notice why your customer should upgrade.
Display your name.
Link to your website.
Key-value object, the key will be displayed as a tab and the value will be the tab content. You can use basic html in the value.
The description will be displayed if a user clicks the 'view details' option.
Perfect! That only took a few minutes to set up using Anystack's plug & play library and seemless integration with the WordPress updater API. You can find the entire example on GitHub including the GitHub Actions workflow to automate the versioning when you create a new tag, additionally you can add any other build steps you require. Anystack will automatically choose any your custom build artifacts instead of the source code assets.
Sign up for free and start to sell, license, and distribute your WordPress plugins.